共计 3823 个字符,预计需要花费 10 分钟才能阅读完成。
一、区别与联系
OpenAPI 3.x 规范是从 Swagger 2.x 分支出来的,主要是由 Linux 基金会的 OpenAPI Initiative 进行维护的。Swagger 2.x 规范被 OpenAPI 3.x 取代,OpenAPI 3.0 成为新的 API 规范标准。但Swagger 2.x 规范仍然被广泛使用,例如常见的 @Api、@ApiOperation 等注解都是 Swagger 2.x 的内容。
| 功能/特性 | Swagger 2.x 注解 | OpenAPI 3.x 注解 |
|---|---|---|
| 类级别描述 | @Api |
@Tag |
| 方法级别描述 | @ApiOperation |
@Operation |
| 参数描述 | @ApiParam |
@Parameter |
| 响应描述 | @ApiResponse |
@ApiResponse |
| 数据模型描述 | @ApiModel |
@Schema |
| 数据模型属性描述 | @ApiModelProperty |
@Schema |
| 接口返回类型 | @ApiResponse |
@ApiResponse |
| 全局参数描述 | @ApiImplicitParam |
不需要使用,参数直接通过 @Parameter 注解定义 |
OpenAPI 3.x
引入依赖:
        <!-- Swagger 相关依赖 -->
        <dependency>
            <groupId>io.springfox</groupId>
            <artifactId>springfox-boot-starter</artifactId>
            <version>3.0.0</version>
        </dependency>
配置类
@Configuration
public class SwaggerConfig {

    @Bean
    public Docket api() {
        return new Docket(DocumentationType.SWAGGER_2)
                .apiInfo(apiInfo())
                .select()
                .apis(RequestHandlerSelectors.withClassAnnotation(Api.class)) // 扫描所有 API 接口
                .paths(PathSelectors.any()) // 所有路径都生成文档
                .build();
    }

    // 添加 API 信息
    private ApiInfo apiInfo() {
        return new ApiInfoBuilder()
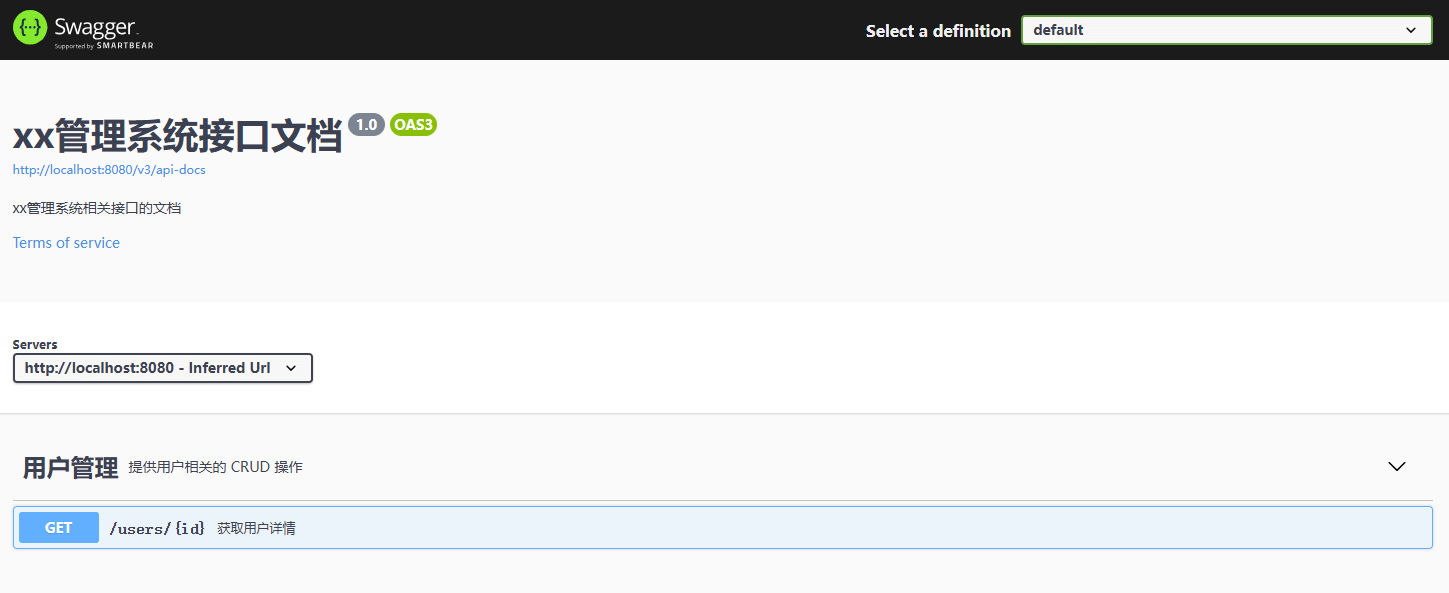
                .title("xx管理系统接口文档")
                .description("xx管理系统相关接口的文档")
                .termsOfServiceUrl("https://www.amjun.com")
                .version("1.0")
                .build();
    }
}
在主程序上添加 @EnableOpenApi 注解。(不确定是否需要)
访问 ui 的路径为:/swagger-ui/index.html,openapi 的 json 格式文档路径:/v3/api-docs

Swagger2.x
引入依赖:
        <!-- Swagger 相关依赖 -->
        <!-- Swagger UI for API documentation interface -->
        <dependency>
            <groupId>io.springfox</groupId>
            <artifactId>springfox-swagger2</artifactId>
            <version>2.7.0</version> <!-- 选择合适的版本 -->
        </dependency>

        <!-- Swagger UI Starter (提供 Swagger UI 界面) -->
        <dependency>
            <groupId>io.springfox</groupId>
            <artifactId>springfox-swagger-ui</artifactId>
            <version>2.7.0</version>
        </dependency>
配置类:
@Configuration
@EnableSwagger2
public class SwaggerConfig {

    @Bean
    public Docket api() {
        return new Docket(DocumentationType.SWAGGER_2)
                .apiInfo(apiInfo())
                .select()
                .apis(RequestHandlerSelectors.withClassAnnotation(Api.class)) // 扫描所有 API 接口
                .paths(PathSelectors.any()) // 所有路径都生成文档
                .build();
    }

    // 添加 API 信息
    private ApiInfo apiInfo() {
        return new ApiInfoBuilder()
                .title("xx管理系统接口文档")
                .description("xx管理系统相关接口的文档")
                .termsOfServiceUrl("https://www.amjun.com")
                .version("1.0")
                .build();
    }
}
访问 ui 的路径为:/swagger-ui.html
二、Swagger2.x 常用注解
1. @Api
- 用于标记一个类作为 Swagger 的资源类。
- 该注解一般用于 Controller 类上,用来说明该类是提供 RESTful API 的地方。
import io.swagger.annotations.Api;

@Api(tags = "用户管理接口", description = "提供用户相关的 CRUD 操作")
@RestController
@RequestMapping("/users")
public class UserController {
    // API 端点
}
2. @ApiOperation
- 用于标记 Controller 方法,描述该方法的作用。
- value:接口的方法描述。
- notes:对接口方法的详细说明。
import io.swagger.annotations.ApiOperation;

@ApiOperation(value = "获取用户详情", notes = "根据用户 ID 获取用户的详细信息")
@GetMapping("/{id}")
public User getUserById(@PathVariable Long id) {
    return userService.getUserById(id);
}
3. @ApiParam
- 用于标注方法参数,描述该参数的详细信息。
- value:描述参数。
- required:标记该参数是否是必填项。
import io.swagger.annotations.ApiParam;

@GetMapping("/{id}")
public User getUserById(
    @ApiParam(value = "用户ID", required = true) @PathVariable Long id) {
    return userService.getUserById(id);
}
三、集成其他ui
1. bootstrap-ui
集成:
        <!-- Swagger 相关依赖 -->
        <dependency>
            <groupId>io.springfox</groupId>
            <artifactId>springfox-boot-starter</artifactId>
            <version>3.0.0</version>
        </dependency>

       <dependency>
            <groupId>com.github.xiaoymin</groupId>
            <artifactId>swagger-bootstrap-ui</artifactId>
            <version>1.9.6</version>
        </dependency>
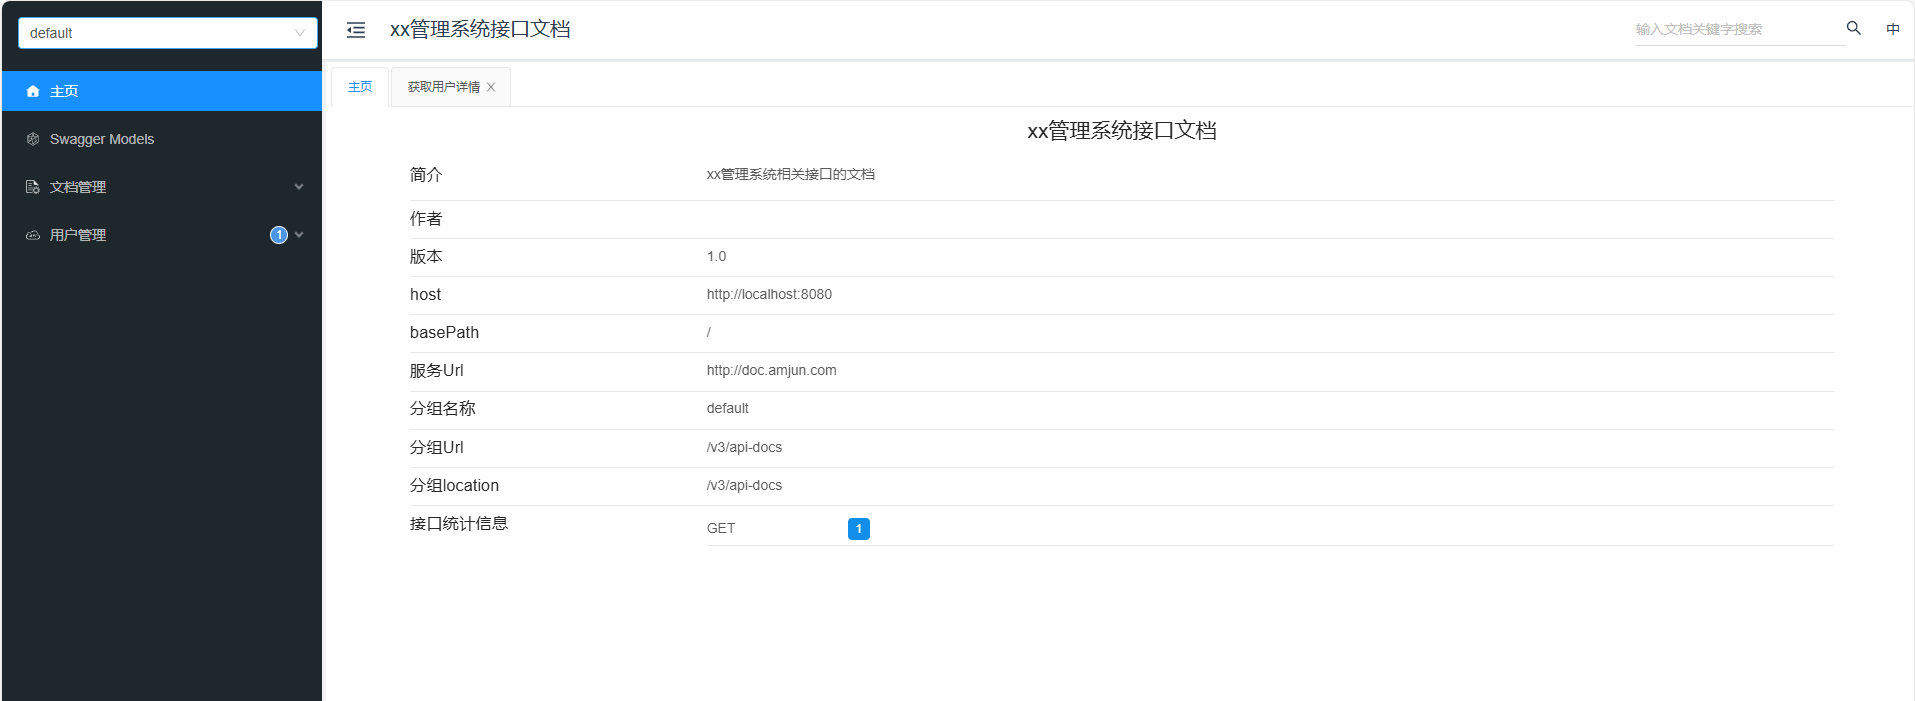
访问 /doc.html 即可查看。

2. Knife4j
项目地址:https://doc.xiaominfo.com/
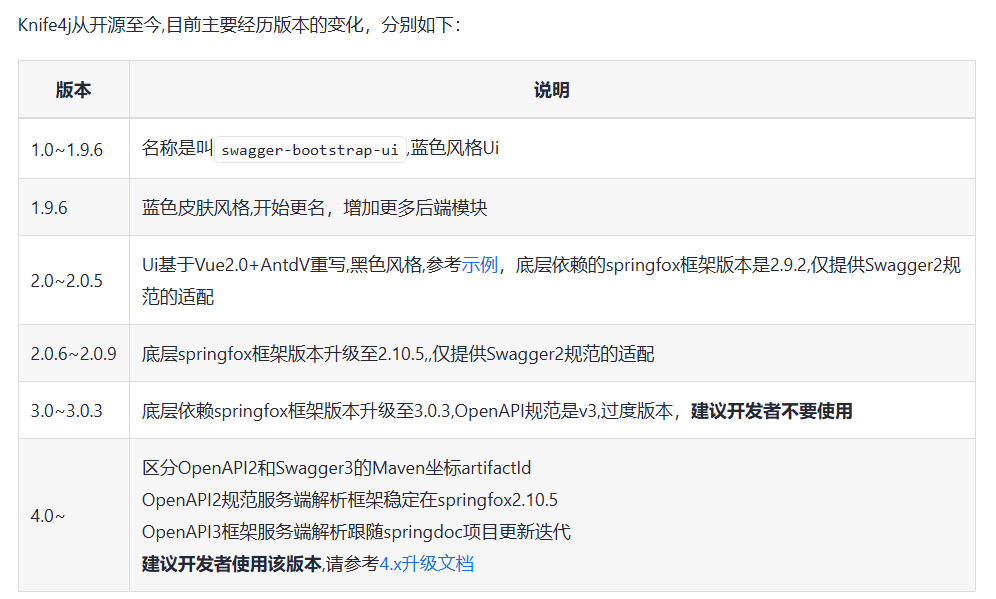
knife4j 的前身是 swagger-bootstrap-ui, 而 swagger-bootstrap-ui 是一个纯 swagger-ui 的皮肤项目。后续为了满足需求,不得不编写 java 代码,所以在swagger-bootstrap-ui 的 1.8.5~1.9.6 版本之间,采用的是后端 Java 代码和 UI 都混合在一个 jar 包。
这种方式只需要引入 jar 包即可,但是在微服务架构下显得有些臃肿。因此正式将项目改名 knife4j。(作者希望做成一个为Swagger接口文档服务的通用性解决方案,不仅仅只是专注于前端Ui前端.)
swagger-bootstrap-ui 的所有特性都会集中在 knife4j-spring-ui 包中,后端 java 代码和 ui 包分离为多个模块的 jar 包,以面对在目前微服务架构下,更加方便的使用增强文档注解(使用SpringCloud微服务项目,只需要在网关层集成UI的 jar 包即可,因此分离前后端)

集成:
        <!-- Swagger 相关依赖 -->
        <dependency>
            <groupId>io.springfox</groupId>
            <artifactId>springfox-boot-starter</artifactId>
            <version>3.0.0</version>
        </dependency>

        <dependency>
            <groupId>com.github.xiaoymin</groupId>
            <artifactId>knife4j-spring-boot-starter</artifactId>
            <version>2.0.9</version>
        </dependency>
同样访问 /doc.html 即可。

提醒:本文发布于380天前,文中所关联的信息可能已发生改变,请知悉!


